Login within the iOS application
Because creation of blogposts needs authentication, the user of the iOS app will be able to login.
If the creation of a blogpost fails due authentication issues we will present a LoginViewController.
The User model
As well as for the blogposts we need a representation of the user model. Create a new class named User:
User.h:
#import <Foundation/Foundation.h>
#import <RestKit/RestKit.h>

@interface User : NSObject

@property (nonatomic, copy) NSString* name;
@property (nonatomic, copy) NSString* password;

+ (RKObjectMapping*)mapping;

@end
User.m:
#import "User.h"

@implementation User

+(RKObjectMapping *)mapping {
    RKObjectMapping* mapping = [RKObjectMapping mappingForClass:[User class]];
    [mapping addAttributeMappingsFromDictionary:@{
                                                  @"name": @"name",
                                                  @"password": @"password"
                                                  }];
    return mapping;
}

@end
Update RestKit Setup
For the login endpoint we create request and response descriptors like the one we created for the blogposts endpoint:
RKRequestDescriptor* loginRequest = [RKRequestDescriptor requestDescriptorWithMapping:[[User mapping] inverseMapping]
                                                                          objectClass:[User class]
                                                                          rootKeyPath:nil
                                                                               method:RKRequestMethodPOST];
RKObjectMapping * emptyMapping = [RKObjectMapping mappingForClass:[NSObject class]];
RKResponseDescriptor* loginResponse = [RKResponseDescriptor responseDescriptorWithMapping:emptyMapping
                                                                                   method:RKRequestMethodPOST
                                                                              pathPattern:@"/users/login"
                                                                                  keyPath:nil
                                                                              statusCodes:statusCodes];
[manager addResponseDescriptorsFromArray:@[blogPostGetResponse, blogPostPostResponse, loginResponse]];
[manager addRequestDescriptorsFromArray:@[blogPostPostRequest, loginRequest]];
In contrast to the other response descriptors we use an empty mapping for the login response. The returned status code is sufficient to see if the login succeeded or not, so we can ignore the response body.
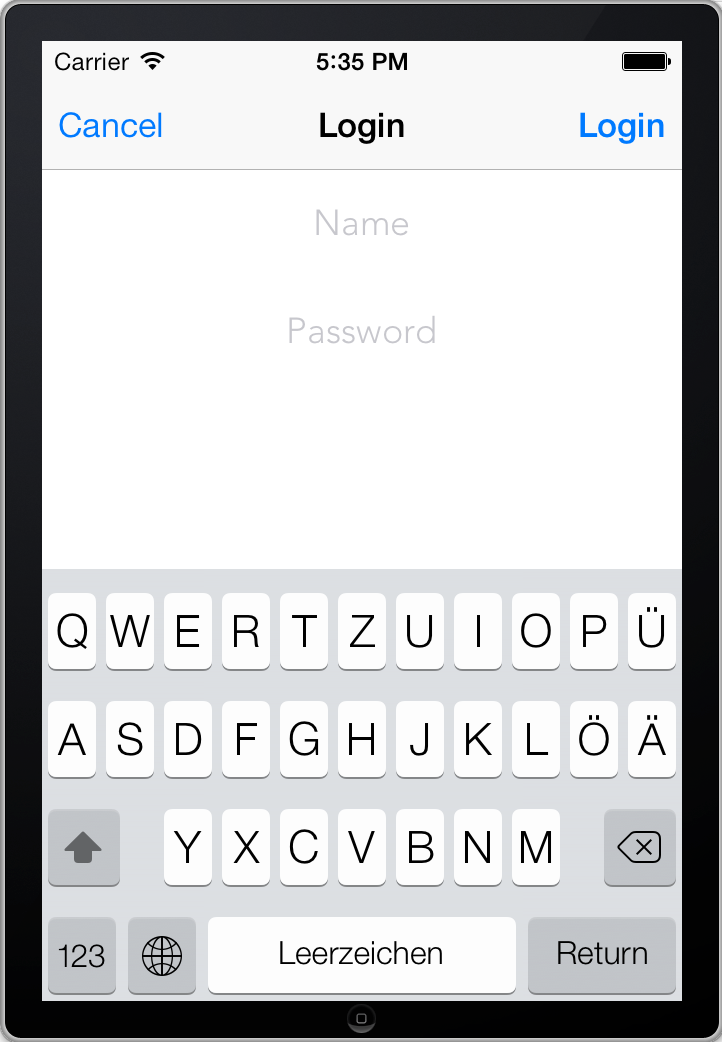
The View
For the login we present a view which contains:
- an UITextField for the name
- an UITextField for the password
- an UILabel to show errors
This is the interface of the view:
#import <UIKit/UIKit.h>

@interface LoginView : UIView

@property (nonatomic, strong) UITextField* name;
@property (nonatomic, strong) UITextField* password;
@property (nonatomic, strong) UILabel* errorLabel;

-(void)showError:(NSString*)error;

@end
Here you find a possible implementation for the view.
The View Controller
LoginViewController.h:
#import <UIKit/UIKit.h>

@protocol LoginViewControllerDelegate;

@interface LoginViewController : UIViewController

@property (nonatomic, weak)id<LoginViewControllerDelegate> delegate;

@end

@protocol LoginViewControllerDelegate <NSObject>

-(void)loginViewController:(LoginViewController*)loginViewController didFinishWithLogin:(BOOL)loggedIn;

@end
LoginViewController.m:
#import <RestKit/RestKit.h>
#import "LoginViewController.h"
#import "LoginView.h"
#import "User.h"

@interface LoginViewController ()

- (void)cancel:(id)sender;
- (void)login:(id)sender;

@end

@implementation LoginViewController

- (id)initWithNibName:(NSString *)nibNameOrNil bundle:(NSBundle *)nibBundleOrNil
{
    self = [super initWithNibName:nibNameOrNil bundle:nibBundleOrNil];
    if (self) {
        self.navigationItem.title = @"Login";
        self.navigationItem.leftBarButtonItem = [[UIBarButtonItem alloc] initWithTitle:@"Cancel"
                                                                                 style:UIBarButtonItemStylePlain
                                                                                target:self
                                                                                action:@selector(cancel:)];
        self.navigationItem.rightBarButtonItem = [[UIBarButtonItem alloc] initWithTitle:@"Login"
                                                                                  style:UIBarButtonItemStyleDone
                                                                                 target:self
                                                                                 action:@selector(login:)];
    }
    return self;
}

- (void)loadView {
    LoginView* loginView = [[LoginView alloc] initWithFrame:[[UIScreen mainScreen] applicationFrame]];
    self.view = loginView;
}

- (void)login:(id)sender {
    LoginView* view = (LoginView*)self.view;
    User* user = [[User alloc] init];
    user.name = [[view name] text];
    user.password = [[view password] text];
    [[RKObjectManager sharedManager] postObject:user
                                           path:@"/users/login"
                                     parameters:Nil
                                        success:^(RKObjectRequestOperation *operation, RKMappingResult *mappingResult) {
                                            [self.delegate loginViewController:self didFinishWithLogin:YES];
    } failure:^(RKObjectRequestOperation *operation, NSError *error) {
        if(operation.HTTPRequestOperation.response.statusCode == 401){
            [view showError:@"You have entered an invalid username or password"];
        } else {
            [view showError:@"An error occured, please try again later"];
        }
    }];

}

- (void)cancel:(id)sender {
    [self.delegate loginViewController:self didFinishWithLogin:NO];
}

@end
Initialization
The initialization code creates two navigation bar buttons. One for login and one for cancel.
login
We create an user object with the values of the textfields. Then the user object is posted to /users/login. If everything is ok we send a message to the delegate that the login was successful.
It’s not necessary to handle the authentication cookie because restkit does that for us.
Note
If you want to persist the cookie you can extract them from the shared NSHTTPCookieStorage and persist it with CoreData or NSKeyedArchiver.
Within the failure block we show an appropriate error message.
Present the Login View
If creating an user object fails with a 403 Forbidden status code we present the login view. Edit the failure block within the sendPost: method:
failure:^(RKObjectRequestOperation *operation, NSError *error) {
        if(operation.HTTPRequestOperation.response.statusCode == 403){
            LoginViewController* loginViewController = [[LoginViewController alloc] initWithNibName:nil
                                                                                             bundle:nil];
            [loginViewController setDelegate:self];
            UINavigationController* navigationController = [[UINavigationController alloc] initWithRootViewController:loginViewController];
            [self presentViewController:navigationController
                               animated:YES
                             completion:nil];
        }
         [(CreateBlogPostView*)self.view showError:@"An error occured, please try again later."];
     }
Edit the CreateBlogPostViewController interface declaration in CreateBlogPostViewController.h so it conforms to the LoginViewControllerDelegate protocol:
@interface CreateBlogPostViewController : UIViewController <UITextViewDelegate, LoginViewControllerDelegate>
Of course the protocol methods must be implemented. If didFinishWithLogin is called we dismiss the LoginViewController. If the user did login successfully we send the blogpost again:
- (void)loginViewController:(LoginViewController *)loginViewController didFinishWithLogin:(BOOL)loggedIn {
    [self dismissViewControllerAnimated:YES completion:^(){
        if(loggedIn){
            [self sendPost:nil];
        }
    }];
}
Test the application
If you try to create a new post the LoginView appears after sending the post. After a successful login you don’t have to login again until you restart the app.